Query refresh does not include new column in data source

Sam Hamels

New Member
Joined
Mar 20, 2018
Messages
49
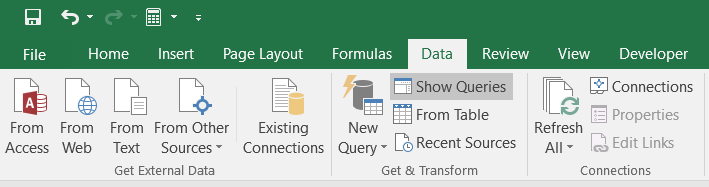
In Excel 2016, I use "queries" (found under the "Data" tab) to extract data from .csv files.
The data from the .csv file is neatly extracted in separate columns in a separate worksheet in my Excel file.
When the .csv file is updated with new values, I can simply "refresh" the query and the data in my Excel worksheet are automatically updated.

However, when the .csv file is updated, it may include an additional "column" (i.e. an additional delimiter and data entry on each row).
When I subsequently "refresh" my data query in Excel, the new column is not automatically added.

I can delete the whole query and re-create it (in which case the new column in the data source is included, but this is quite cumbersome.
How can I make the new column automatically appear when I refresh the query?


Cheers,
Sam


dNnGuc
dNnGuc
dNnGuc
dNnGuc
 

Excel Facts

Format cells as time
Select range and press Ctrl+Shift+2 to format cells as time. (Shift 2 is the @ sign).
Welcome to MrExcel forums.

I'm not too familiar with Excel's Power Query (Get & Transform), but had a play around with it and think I've found a simple solution.

If you edit the query and click Advanced Editor, you will see that part of the Power Query formula script is "Columns=n,", where n is the number of columns in the .csv file, defined when the query first imports the .csv file. In this example it is "Columns=4,":

Code:
let
    Source = Csv.Document(File.Contents("C:\Temp\CSV data.csv"),[Delimiter=",", Columns=4, Encoding=1252, QuoteStyle=QuoteStyle.None]),
    #"Promoted Headers" = Table.PromoteHeaders(Source, [PromoteAllScalars=true]),
    #"Changed Type" = Table.TransformColumnTypes(#"Promoted Headers",{{"Col1", type date}, {"Col2", type time}, {"Col3", type text}, {"Col4", Int64.Type}})
in
    #"Changed Type"
In the Advanced Editor simply delete the "Columns=n," (including the comma), so that for this example the PQ formula script becomes:

Code:
let
    Source = Csv.Document(File.Contents("C:\Temp\CSV data.csv"),[Delimiter=",", Encoding=1252, QuoteStyle=QuoteStyle.None]),
    #"Promoted Headers" = Table.PromoteHeaders(Source, [PromoteAllScalars=true]),
    #"Changed Type" = Table.TransformColumnTypes(#"Promoted Headers",{{"Col1", type date}, {"Col2", type time}, {"Col3", type text}, {"Col4", Int64.Type}})
in
    #"Changed Type"
I then added a 5th column to the .csv file and refreshed the query and the table updated with all 5 columns, even though the Table.TransformColumnTypes part of the script still specifies just 4 columns.
 
Upvote 0
That works perfectly, thanks!

In the meantime, I had also figured out another solution:

Instead of clicking on "New Query" and choosing "from file" and "from .csv",
I clicked directly on the "From text" file in the Data tab ribbon. My .csv files had to be .txt files instead, but that's fine.
The contents of the .txt file are pasted into a new sheet with the values neatly separated in columns.
If I subsequently update the .txt file with a new "column" (one additional delimiter and item) and click on "Refresh all" in the ribbon, the new column is added flawlessly.
Same goes for updating the .txt file and removing columns in the process. Just hit "Refresh all" and the data pulled into Excel automatically adjusts.


text.png
 
Upvote 0

Forum statistics

Threads
1,214,632
Messages
6,120,652
Members
448,975
Latest member
sweeberry

We've detected that you are using an adblocker.

We have a great community of people providing Excel help here, but the hosting costs are enormous. You can help keep this site running by allowing ads on MrExcel.com.
Allow Ads at MrExcel

Which adblocker are you using?

Disable AdBlock

Follow these easy steps to disable AdBlock

1)Click on the icon in the browser’s toolbar.
2)Click on the icon in the browser’s toolbar.
2)Click on the "Pause on this site" option.
Go back

Disable AdBlock Plus

Follow these easy steps to disable AdBlock Plus

1)Click on the icon in the browser’s toolbar.
2)Click on the toggle to disable it for "mrexcel.com".
Go back

Disable uBlock Origin

Follow these easy steps to disable uBlock Origin

1)Click on the icon in the browser’s toolbar.
2)Click on the "Power" button.
3)Click on the "Refresh" button.
Go back

Disable uBlock

Follow these easy steps to disable uBlock

1)Click on the icon in the browser’s toolbar.
2)Click on the "Power" button.
3)Click on the "Refresh" button.
Go back
Back
Top