Keeping default signature when sending emails from Gmail using vba macro

Bering

Board Regular
Joined
Aug 22, 2018
Messages
185
Office Version
  1. 2016
Platform
  1. Windows
Hello,

is there a way to keep the default signature associated with my gmail account when sending an email from Gmail through VBA (I am using CDO if that can be helpful).

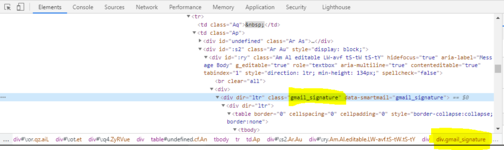
Below is the bit of code relevant to the email configuration: everything works fine except for the missing signature.

Any idea? Thank you.


Code:
'Update the configuration fields    Mail.Configuration.Fields.update
    
    'Set All Email Properties
    With Mail
        
        .Subject = Sheets("Mail").Range("MailSubject")
        .From = Application.Username
        .To = "user1@gmail.com"
'        .CC = "user2@gmail.com"
'        .BCC = "user3@gmail.com"


        .textbody = Sheets("Mail").Range("MailBody")
         strLocation = Sheets("Mail").Range("AttachPath")
         strFileName = Sheets("Mail").Range("AttachFileName")
         strFileExt = Sheets("Mail").Range("AttachFileExt")
'
        .AddAttachment strLocation & strFileName & strFileExt


    End With
    
    Mail.Send
    MsgBox ("Mail has been Sent")
 
Last edited:

Excel Facts

Fastest way to copy a worksheet?
Hold down the Ctrl key while dragging tab for Sheet1 to the right. Excel will make a copy of the worksheet.
Try this:

Change this line:

Code:
.textbody = Sheets("Mail").Range("MailBody")

By:

Code:
[COLOR=#0000ff].HTMLBody[/COLOR]= Sheets("Mail").Range("MailBody") & [COLOR=#0000ff].HTMLBody[/COLOR]
 
Upvote 0
Thank you DanteAmor, I have just tried this and unfortunately it does't work: the body of my email is a combination of text and formulae concatenating several CHAR(10) to add line breaks.

By changing the line as you suggested the signature still does not show and the body is now showing in two rows without line breaks.

Try this:

Change this line:

Code:
.textbody = Sheets("Mail").Range("MailBody")

By:

Code:
[COLOR=#0000ff].HTMLBody[/COLOR]= Sheets("Mail").Range("MailBody") & [COLOR=#0000ff].HTMLBody[/COLOR]
 
Upvote 0
I figure out how to fix this!! I found this brilliant function that converts the content of a cell (in this case, the body of my email) to HTML format which allows me to preserve the original formatting. I post it in case someone else is interested.

However, now I have a different issue: the emails goes out but does not show in the sent folder of the mailbox. Any idea?

Thanks.

https://social.msdn.microsoft.com/F...matted-excel-cell-to-html-format?forum=isvvba


Code:
Function fnConvert2HTML(myCell As Range) As String    Dim bldTagOn, itlTagOn, ulnTagOn, colTagOn As Boolean
    Dim i, chrCount As Integer
    Dim chrCol, chrLastCol, htmlTxt As String
    
    bldTagOn = False
    itlTagOn = False
    ulnTagOn = False
    colTagOn = False
    chrCol = "NONE"
    htmlTxt = "<html>"
    chrCount = myCell.Characters.Count
    
    For i = 1 To chrCount
        With myCell.Characters(i, 1)
            If (.Font.Color) Then
'                chrCol = fnGetCol(.Font.Color)
                If Not colTagOn Then
                    htmlTxt = htmlTxt & "<font color=#" & chrCol & ">"
                    colTagOn = True
                Else
                    If chrCol <> chrLastCol Then htmlTxt = htmlTxt & "</font><font color=#" & chrCol & ">"
                End If
            Else
                chrCol = "NONE"
                If colTagOn Then
                    htmlTxt = htmlTxt & "</font>"
                    colTagOn = False
                End If
            End If
            chrLastCol = chrCol
            
            If .Font.Bold = True Then
                If Not bldTagOn Then
                    htmlTxt = htmlTxt & "<b>"
                    bldTagOn = True
                End If
            Else
                If bldTagOn Then
                    htmlTxt = htmlTxt & "</b>"
                    bldTagOn = False
                End If
            End If
    
            If .Font.Italic = True Then
                If Not itlTagOn Then
                    htmlTxt = htmlTxt & "<i>"
                    itlTagOn = True
                End If
            Else
                If itlTagOn Then
                    htmlTxt = htmlTxt & "</i>"
                    itlTagOn = False
                End If
            End If
    
            If .Font.Underline > 0 Then
                If Not ulnTagOn Then
                    htmlTxt = htmlTxt & "<u>"
                    ulnTagOn = True
                End If
            Else
                If ulnTagOn Then
                    htmlTxt = htmlTxt & "</u>"
                    ulnTagOn = False
                End If
            End If
            
            If (Asc(.Text) = 10) Then
                htmlTxt = htmlTxt & "<br>"
            Else
                htmlTxt = htmlTxt & .Text
            End If
        End With
    Next
    
    If colTagOn Then
        htmlTxt = htmlTxt & "</font>"
        colTagOn = False
    End If
    If bldTagOn Then
        htmlTxt = htmlTxt & "</b>"
        bldTagOn = False
    End If
    If itlTagOn Then
        htmlTxt = htmlTxt & "</i>"
        itlTagOn = False
    End If
    If ulnTagOn Then
        htmlTxt = htmlTxt & "</u>"
        ulnTagOn = False
    End If
    htmlTxt = htmlTxt & "</html>"
    fnConvert2HTML = htmlTxt
End Function
 
Upvote 0
Solution
I'm sorry, but I have not found a solution to show the emails in the sent folder.
 
Upvote 0
Hi , I am a self taught ( YouTube & Forums) newbie to VBA, so please forgive me if I do use the correct terms or follow forum rules.

with regards to the above case, which is asked everywhere with no solid and executable solution, I have found a great solution to this problem which has taken me over three days to resolve.

After searching online through a whole bunch of "solutions", from converting cell values to HTML to inserting images to the body text and come to "it is not possible to have your default Gmail signature present through VBA IMAP/client web app", I have however found a solution which works 100% using vba code to insert the default Gmail signature in the body text of the mail.

It utilises Ron de Bruin's code - Insert Outlook Signature in mail, where the function (GetBoiler) to read and copy the specific text from a source file.

I have adjusted the code to obviously suit Gmail protocols and have also obtained HTML code from the Gmail inspect windows which I have saved as a .txt file which is the source file mentioned above. This source file contains the HTML code of the style, format and layout of my default Gmail Signature. This is found when you right click on the text of your Gmail signature and click inspect, a window will pop up follow this code upwards until you see a title which resembles - div.gmail_signature.

as can be seen in the image provided. you right click on this section, copy the code into a blank notepad and save it as you please.

when referenced into the code as mentioned above it works perfectly.
 

Attachments

  • div.gmail_signature.PNG
    div.gmail_signature.PNG
    32.3 KB · Views: 111
Upvote 0

Forum statistics

Threads
1,214,606
Messages
6,120,479
Members
448,967
Latest member
visheshkotha

We've detected that you are using an adblocker.

We have a great community of people providing Excel help here, but the hosting costs are enormous. You can help keep this site running by allowing ads on MrExcel.com.
Allow Ads at MrExcel

Which adblocker are you using?

Disable AdBlock

Follow these easy steps to disable AdBlock

1)Click on the icon in the browser’s toolbar.
2)Click on the icon in the browser’s toolbar.
2)Click on the "Pause on this site" option.
Go back

Disable AdBlock Plus

Follow these easy steps to disable AdBlock Plus

1)Click on the icon in the browser’s toolbar.
2)Click on the toggle to disable it for "mrexcel.com".
Go back

Disable uBlock Origin

Follow these easy steps to disable uBlock Origin

1)Click on the icon in the browser’s toolbar.
2)Click on the "Power" button.
3)Click on the "Refresh" button.
Go back

Disable uBlock

Follow these easy steps to disable uBlock

1)Click on the icon in the browser’s toolbar.
2)Click on the "Power" button.
3)Click on the "Refresh" button.
Go back
Back
Top