
Add Your Own Styles
September 14, 2023 - by Bill Jelen

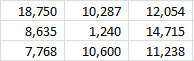
Problem: Most of my worksheets deal with positive numbers. Thus, I prefer to use a number format of “#,##0” instead of the accounting format. When I use the Comma style, Excel uses the accounting format. This format allows for the possibility of negative numbers in parentheses, and therefore all the positive numbers are not quite right-aligned with the cell as shown here.
You can add your own new style to a workbook. First, format a cell with the correct formatting. It might be easiest to go to a blank cell that had not previously been formatted. Type a number and format that cell. To reach the full Format Cells dialog, use the Ctrl+1 shortcut key. On the Number tab, choose the Number category. Specify 0 decimal places and a thousands separator. On the Alignment tab, specify right-aligned and top-aligned.
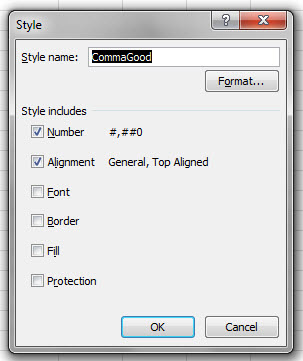
To create a new style, select the cell with the formatting for that style. Open the Cell Styles dropdown and choose New Style from the bottom of the menu.
Give the style a name such as CommaGood.
Because this a numeric style, you want to apply the settings from the Number and Alignment tab, but you do not want to change the existing font, color, fill, or borders. Uncheck the boxes for Font, Border, Fill, and Protection.
Click OK to create the style. Your custom styles now appear at the top of the Cell Styles menu.
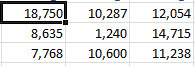
When you apply the CommaGood style, you get the thousands separator without the extra space after the number.
This article is an excerpt from Power Excel With MrExcel
Title photo by Marcus Ganahl on Unsplash