
Excel 2020: Create Your Own QAT Routines Using VBA Macros
December 23, 2020 - by Bill Jelen

There are several short macros you can add to your Personal Macro Workbook and then add to the QAT. In this tip, you will see how to create the Personal Macro Workbook, type some macros, and then assign them to icons on the QAT.
Create a Personal Macro Workbook
Start from any workbook. Go to View, Macros, Record Macro. In the Record Macro dialog, type a one-word name such as HelloWorld. Choose Personal Macro Workbook. Click OK.
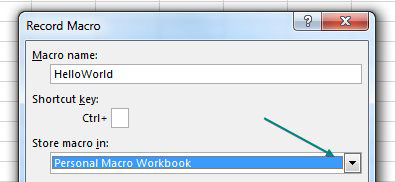
Type Hello in the active cell and press Enter. Then, select View, Macros, Stop Recording. These steps will create a Personal.xlsb on your computer where you can store new macros.
Open the VBA Editor and Find Module1 in Personal.xlsb
From Excel, press Alt+F11. (If you don't have Alt+F11, you can add the Visual Basic command to the QAT and click that.
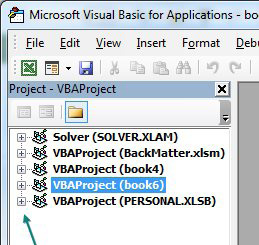
Your first time in the VBA editor, it might be a vast expanse of grey. From the VBA menu, select View, Project Explorer.
Look for an entry called VBAProject (PERSONAL.XLSB). Click the + icon to expand it.
Look for and expand Modules. Right-click Module1 and choose View Code.
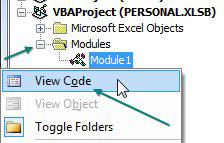
You will see your HelloWorld code. After the End Sub, type any of these procedures.
Sub VeryHideActiveSheet()
    ActiveSheet.Visible = xlVeryHidden
End Sub
Sub ShowAllSheets()
    For Each sh In ActiveWorkbook.Worksheets
        sh.Visible = True
    Next sh
End Sub
Sub UpperSelection()
    For Each cell In Selection.SpecialCells(2, 2)
        ' 2, 2 means xlCellTypeConstants, Text
        cell.Value = UCase(cell.Value)
    Next
End Sub
Sub LowerSelection()
    For Each cell In Selection.SpecialCells(2, 2)
        cell.Value = LCase(cell.Value)
    Next
End Sub
Sub ProperSelection()
    For Each cell In Selection.SpecialCells(2, 2)
        cell.Value = Application.WorksheetFunction.Proper(cell.Value)
    Next
End Sub
When you customize the QAT, choose Macros from the top left drop-down menu.
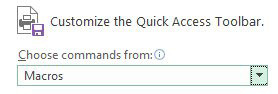
When you choose a macro and click Add>> the icon will default to a flow chart. Click Modify at the bottom right. Choose a new icon. Type a good tooltip.
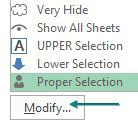
Here is an explanation of how to use these five macros:
- Very Hide: Worksheets can be visible, hidden or very hidden. Few people know about Very Hidden sheets because you have to use VBA to create them. A worksheet that is Very Hidden will not show up in Home, Format, Hide and Unhide, Worksheets. (Thanks to -Sagar Malik)
- Show All Sheets: It is easy to select 12 sheets and hide them in a single command. But then unhiding the sheets is a one-at-a-time proposition. This macro will unhide all sheets (including very hidden sheets).
- Upper Selection: Converts all text in the selection to upper case.
- Lower Selection: Converts all text in the selection to lower case.
- Proper Selection: Converts all text in the selection to proper case.
Thanks to MF Wong for suggesting some of these macros.
Title Photo: Markus Spiske at Unsplash.com
This article is an excerpt from MrExcel 2020 - Seeing Excel Clearly.