
Excel Custom Data Types
November 06, 2021 - by Suat M. Ozgur

When I first watched Bill Jelen’s video, Yes!!! Define Your Own Linked Data Types in Excel! Episode 2378, I was so excited to learn how I can define data types in Power Query. However, the object-oriented programmer beast in my mind kept asking “Hey, Excel Development Team, why not more freedom?”. Then I heard what Bill said at 14:17 – “That’s ok because some Tuesday, it will be there”. Yes, it was another Tuesday last week that the Excel Development Team made their huge move about creating Custom Data Types. Although it is still in beta mode and you may need to join the Office Insider program to follow the rest of this article, it is certainly a big step that gives developers a huge power to represent data in Excel 365.
In this article, I will demonstrate how you can create a custom function that returns a custom data type and easily extract properties as you may need, including associated images. Additionally, I will also show how you can nest entities in other entities to show cards.
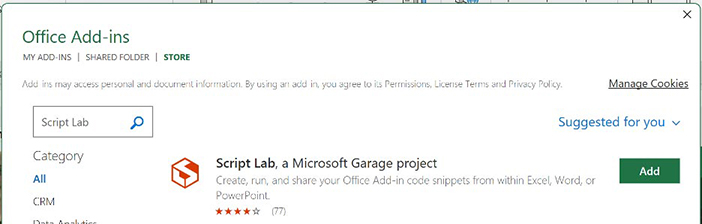
Instead of creating an Office add-in, you are going to use the Microsoft Script Lab add-in that you can create and run the snippets and instantly see the result in a task pane and in the Office document. Go to Insert, My Add-ins, and click STORE to open the Office Add-ins window. Search for the “Script Lab” and click on the Add button next to the add add-in.
Create a new workbook, find the Script Lab ribbon tab, and click Code to open the code pane to test the sample implementation below.

Click the New Snippet button in the code pane, rename the new snippet as Demo, delete everything in the script editor and copy and paste the following code to create a custom function called getArticle(). This function returns a JavaScript object consisting of properties and corresponding values defining the custom data type.
/**
 * @customfunction
 * @returns {any}
 */
function getArticle() {
  return {
    type: "Entity",
    text: "Create a Personal Macro Workbook",
    properties: {
      publishDate: {
        type: "FormattedNumber",
        basicValue: 44505,
        numberFormat: "m/d/yyyy"
      },
      author: {
        type: "String",
        basicValue: "Bill Jelen"
      },
      image: {
        type: "WebImage",
        address: "https://www.mrexcel.com/img/excel-tips/2021/11/create-a-personal-macro-workbook-sm.jpg"
      }
    }
  };
}
Click Register to expose the new custom function to the current Excel application instance and enter the following formula into cell A1.
=SCRIPTLAB.DEMO.GETARTICLE()
Congratulations! You just created your first data type and placed it in a cell as an entity by using a custom function.
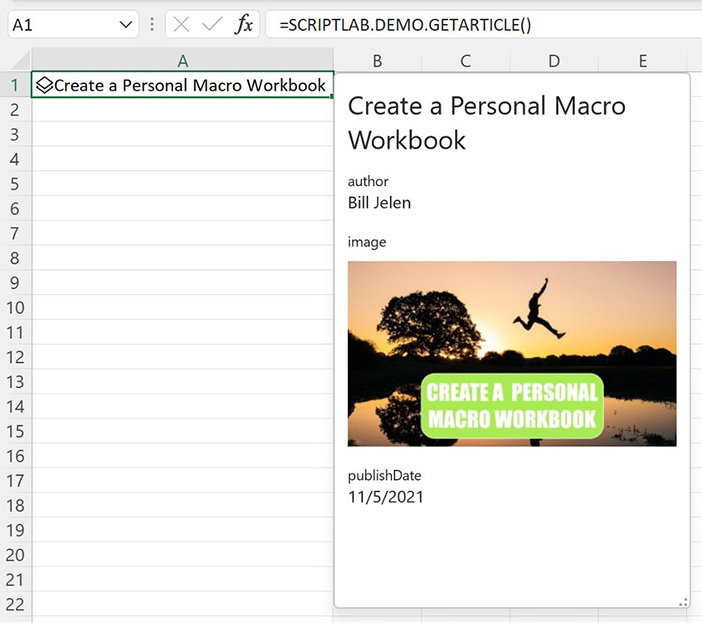
Since A1 contains a data type – entity, you can now get all properties exposed by the entity to fill the other cells just like you would do with the internal Excel data types like Stocks, Currencies, or Geography.
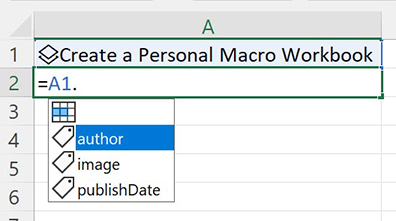
Finally, you can get all properties as shown below, including images defined by the web image’s address as an object property.

Let’s analyze the custom function that simply returns a JavaScript object which is all we need to do to build to create a custom data type. In this sample code snippet, you used a hard-coded object as the function’s return value. This custom data type is defined by the following properties: type, text, and properties.
- type: (Cell value type) Instruct Excel on how to treat the cell that contains the custom data type. This property also defines the other properties according to the selected cell value type. The following properties are also provided for the “Entity” cell value type.
- text: The text value to be shown in the cell with the entity generated by the custom data type.
- properties: The properties of the entity.
The properties property contains the entity properties that could be defined as basic data types i.e., formatted number and string, and more importantly as also other entities that could be embedded as other custom data types into the parent entity. You will see that later, for now, we used a formatted number for the publish date, a string for the author’s name, and a web image for the article image. All these data types are constructed with the associated properties. Notice how the image URL is defined with the address property of the web image data type.
Let’s make it more interesting and get the author’s image instead of only the name of the author. In this case, you will create another entity property instead of a string property. Change the author section in the code with the following.
      author: {
        type: "Entity",
        text: "Bill Jelen",
        properties: {
          image: {
            type: "WebImage",
            address: "https://www.mrexcel.com/img/authors/bill-jelen.jpg"
          },
        }
      },
Click on Register to refresh the custom function and look at cell A3 to click the Show Card icon just appeared next to the author’s name.

Since the author property is not just a string but an entity data type now, Excel wants to show the properties of this entity and it just works like the internal data types.
Enter the following formula in cell B2 to see how the entity data type property behaves like an entity.
=A2.image

When we were discussing the custom data types with Bill, the first thing he asked me “What about returning multiple items for a property of an entity?”. That was the beautiful question that led me to dig the Array data type. In the following section, you will change the object properties to return the author’s books that will be spilled as a dynamic array!
The Excel Development Team also exposed a new data type called “Array” in the beta preview. The Array contains a property called "elements" that you can embed the child elements that will be spilled as a dynamic array. Change the author section in the code with the following.
    author: {
        type: "Entity",
        text: "Bill Jelen",
        properties: {
          image: {
            type: "WebImage",
            address: "https://www.mrexcel.com/img/authors/bill-jelen.jpg"
          },
          books: {
            type: "Array",
            elements: [
              [
                {
                  type: "String",
                  basicValue: "MrExcel 2021 – Unmasking Excel"
                }
              ],
              [
                {
                  type: "String",
                  basicValue: "MrExcel 2020 - Seeing Excel Clearly"
                }
              ],
              [
                {
                  type: "String",
                  basicValue: "Excel Dynamic Arrays Straight to the Point 2nd Edition"
                }
              ]
            ]
          }
        }
      },
Click on Register to refresh the custom function and click the Show Card next to the author’s name.

Click the "Extract books to grid" (optionally enter the following formula in cell B3) and see the result.
=A3.books
or even the following by using the main entity - article.
=A1.author.books
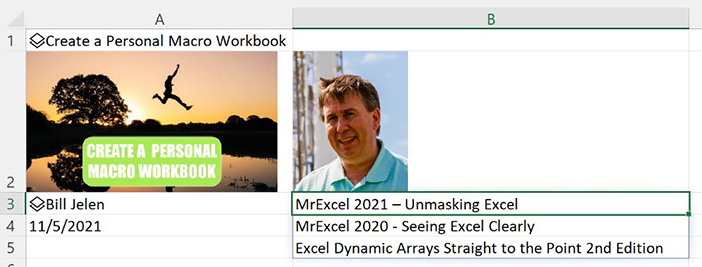
Notice that the books property is defined as Array type and its elements represent a dynamic array spilling to rows.
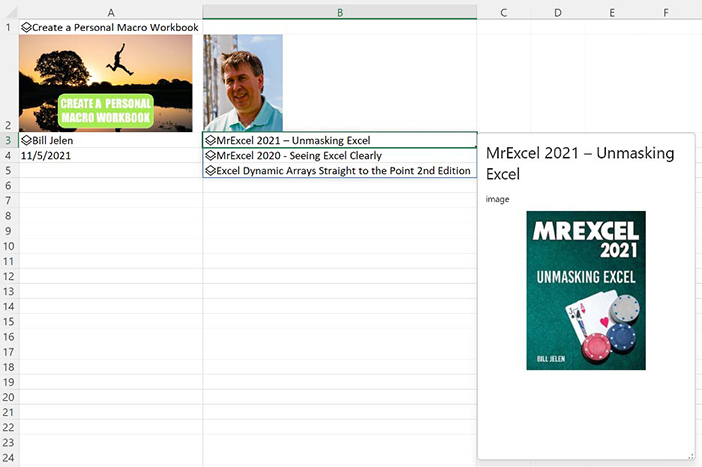
As a final touch to see the amazing flexibility of the custom data types, change the author section with the following code and notice that books elements can be also entities that own their properties.
      author: {
        type: "Entity",
        text: "Bill Jelen",
        properties: {
          image: {
            type: "WebImage",
            address: "https://www.mrexcel.com/img/authors/bill-jelen.jpg"
          },
          books: {
            type: "Array",
            elements: [
              [
                {
                  type: "Entity",
                  text: "MrExcel 2021 – Unmasking Excel",
                  properties: {
                    image: {
                      type: "WebImage",
                      address: "https://www.mrexcel.com/img/products/2021/02/mrexcel-2021-unmasking-excel-sm.jpg"
                    }
                  }
                }
              ],
              [
                {
                  type: "Entity",
                  text: "MrExcel 2020 - Seeing Excel Clearly",
                  properties: {
                    image: {
                      type: "WebImage",
                      address: "https://www.mrexcel.com/img/products/2020/01/mrexcel-2020-seeing-excel-clearly-sm.jpg"
                    }
                  }
                }
              ],
              [
                {
                  type: "Entity",
                  text: "Excel Dynamic Arrays Straight to the Point 2nd Edition",
                  properties: {
                    image: {
                      type: "WebImage",
                      address:
                        "https://www.mrexcel.com/img/products/2020/01/excel-dynamic-arrays-straight-to-the-point-2nd-edition-sm.jpg"
                    }
                  }
                }
              ]
            ]
          }
        }
      },
Notice the Show Card icons just appeared next to the book entities.
I can clearly say that the new custom data types make the Excel environment is a much more powerful playground for the developer. Although it is not the Excel developer’s responsibility to build a web API to return it, you will still need to construct the requested JSON string structure from the web service so the web developer can create an API based on your entity properties.
This article is only focused on introducing some of the new custom data types and the JavaScript object to be used to form an entity in a cell, but this demo project could be easily turned into a tool downloading dynamic data from a web server that could be requested by article ids. In the second article of this series, I will demonstrate a basic web application to download the requested article’s JSON string from an online source that could be converted to an object in JavaScript to create the custom data type.
Title photo by Michael Dziedzic on Unsplash